It's Valentine's Day which means it's all about the love and sweetness today! That's why I crafted these delicious Strawberry Cheesecake Cinnamon Rolls - a new take on one of my favorite breakfast/dessert items, Cinnamon Rolls.

The Strawberry filling screams red, pink, & white sweetness and reinforces the Valentines'd Day holiday spirit!
This was inspired by my Homemade Cinnamon Rolls recipe on this site, and pairs well with a lovely cup of coffee or tea.
Jump to:
Ingredients
I specifically used White Lily Self-Rising Flour because it helps make the rolls fluffier. I also grew up on White Lily Flour and think it's a great flour to use for desserts that need some volume.
Dough
- White Lily Self Rising Flour
- Active Yeast
- Warm Milk
- Sugar
- Butter
- Salt
- Vanilla Extract
Strawberry Filling
- Butter
- Sugar
- Strawberries
Cream Cheese Frosting
- Cream Cheese
- Butter
- Vanilla Extract
- Powdered Sugar
*See recipe card for quantities*
Instructions
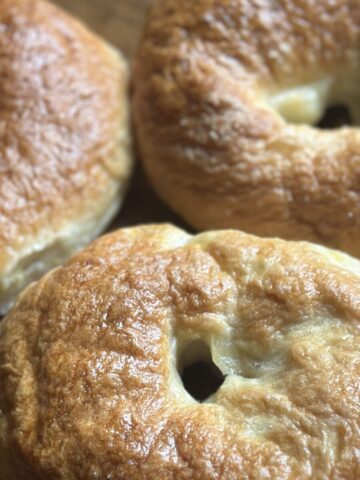
Here's a glimpse at what the process will look like!

Start by making your dough!

Make your Strawberry filling.

Craft your Strawberry Cheesecake Cinnamon Rolls by separating the dough and filling into individual rolls.

Glaze with Cream Cheese Frosting!
Hint: Use the sharpest knife you can find to cut your log of dough so you don't smoosh your rolls as you cut each one individually.
Substitutions
- Gluten Free - use gluten free flour instead of normal self-rising flour to make this gluten free
- Yeast - if you don't have active dry yeast, you can use quick rise (known as Instant) yeast and you don't have to give it proofing time at the beginning of the recipe. You can add it immediately to your dry ingredients and mix in. However, I still suggest proofing regardless to make sure the yeast is doing what it's supposed to do.
Variations
- Fruit - if you want a different fruit filling, you can substitute the chopped strawberries for another kind of berry fruit like blueberries, blackberries or raspberries!
Equipment
My KitchenAid Standing Mixer is my go to for this, but if you don't have one, you can always try this recipe with a handheld electric mixer:
- Handheld Electric Mixer: A hand mixer is a convenient and cost-effective alternative to a stand mixer. It comes with various attachments (beaters and dough hooks) and can handle tasks like whipping, creaming, and mixing. While it's not as powerful as a stand mixer, it gets the job done for most baking recipes.
- Whisk and Elbow Grease: For recipes that require whisking, such as making meringue or whipped cream, you can use a manual whisk and your own arm strength.
Remember that while these alternatives can get the job done, they may require more time and effort compared to a KitchenAid Stand Mixer.
You can find some of my favorite equipment here if you need any guidance!

Valentine's Strawberry Cheesecake Cinnamon Rolls Recipe
Equipment
- 1 cast iron skillet I used a 10⅝" Lodge
- 1 KitchenAid Stand Mixer (and bowl) I used dough hook and wire whip attachments
- 1 Small Mixing Bowl
- 1 Dry Towel Rag
- 1 Medium Sauce Pan
- 1 Spatula I used a rubber spatula
- 1 Rolling Pin
- 1 Knife
Ingredients
Dough
- 4 cups White Lily Self-Rising Flour
- 1 tablespoon active yeast
- 1 cup warm milk
- ¼ cup cane sugar you can add a lil' bit more if ya feeling sexy 😉
- 4 tablespoon salted butter softened
- 1 teaspoon salt
- 1 large egg
- 1 teaspoon vanilla extra ...2 if ya sexy
Strawberry Filling
- 4 tablespoon salted butter
- ¼ cup cane sugar
- 2 cups strawberries chopped
Cream Cheese Frosting
- ½ block cream cheese room temperature
- 4 tablespoon salted butter softened
- 1 tablespoon vanilla extract
- ½ cup powdered sugar
Instructions
Dough
- In a small mixing bowl, combine warm milk and active yeast. Give it a good stir and set it aside for 10 minutes until the top becomes frothy.
- Grab your KitchenAid Standing Mixer and attach a dough hook. Add White Lily Self Rising Flour, sugar, butter, salt, and vanilla to the Mixer's bowl.
- Once ready, pour in your activated yeast and warm milk blend from the small mixing bowl. Then add in your egg.
- Turn KitchenAid Standing Mixer on (don't forget to lock it!) medium speed until ingredients are well combined. It took me around 5 minutes to mix well. Continue to mix past 5 minutes if you notice ingredients not fully mixed in.
- Grab a kitchen cloth or rag and cover the dough bowl and set aside on the counter for 1 hour.
Strawberry Filling
- In a medium sauce pan, add in butter, sugar, and strawberries. Turn stove on low-medium heat. Using a spatula, slowly stir contents as they start to caramelize. You should end up with a jam-like consistency. HOW LONG DID THIS TAKE?
- Then place contents in the fridge for 30 minutes to cool and solidify.
Making the Rolls
- Once your dough has risen and your filling is chilled, flour a flat surface and transfer the dough content to your surface top.
- Using a rolling pin, roll out your dough into a large square. You want the thickness to be 1½-2 inches.
- Using your spatula, take your filling and spread it across the dough surface area leaving about ½ an inch of room away from the dough's edges.
- Next, roll one side of your square towards the other, making a log shape. It's ok if there's some filling overflow after rolling.
- Using a knife, cut your log (log should be horizontal), into about 6-7 evenly sized parts.
- Preheat your oven to 375℉.
- Place 2 tbsps of butter into your cast iron skillet and place in oven to preheat. Should only take a minute or two. Remove once butter is fully melted across pan.
- Place the cut rolls next to each other in your cast iron. They can definitely be touching each other.
- Then place everything in oven for 20 minutes. Once done, remove and let cool on countertop.
Cream Cheese Frosting
- While your cinnamon rolls are cooling, grab your KitchenAid Stand Mixer and attach the wire whip attachment. In the mixer's bowl, add Cream Cheese Frosting ingredients and mix on low-medium speed until well-mixed and you get a frosting consistency.
- Spread across your Strawberry rolls and let the Frosting marinate into the dough for a minute or so before serving.
Video
Top Tip
Let your Strawberry Cheesecake Cinnamon Rolls cool just slightly before applying cream cheese frosting so the topping doesn't completely melt, but still oozes into the swirls crevices!
Storage
- Room Temperature: If you plan to consume the cinnamon rolls within 1-2 days, you can store them at room temperature. Place the cooled cinnamon rolls in an airtight container or wrap them tightly in plastic wrap. Keep them in a cool, dry place away from direct sunlight and heat sources.
- Refrigerator: If you want to store the cinnamon rolls for a longer period, you can refrigerate them. Place the cooled rolls in an airtight container or wrap them tightly in plastic wrap. Refrigerate for up to 3-4 days. Before serving, you can warm them up in the microwave or oven to restore their softness.
- Freezer: To store cinnamon rolls for an extended period, freezing is the best option. After the rolls have cooled completely, wrap each roll individually in plastic wrap, then place them in a freezer-safe bag or container. Freeze for up to 1-2 months. When ready to eat, thaw the rolls overnight in the refrigerator or at room temperature, then reheat in the microwave or oven before serving.
- Reheating: Whether you're storing the cinnamon rolls at room temperature, in the refrigerator, or in the freezer, it's best to reheat them before serving for the best taste and texture. You can warm them up in the microwave for a few seconds or in the oven at a low temperature until heated through.
FAQ
Not Enough Kneading: Proper kneading is essential for developing gluten in the dough, which gives it structure and helps it hold its shape. If you haven't kneaded the dough enough, it may remain sticky. Knead the dough until it is smooth and elastic.
Underproofing: Proper proofing (allowing the dough to rise) is crucial for developing the desired texture in cinnamon rolls. If the dough hasn't been allowed to rise sufficiently, it may remain sticky. Ensure that you give the dough enough time to double in size during proofing.
Yeast Issues: Make sure your yeast isn't expired or inactive! Additionally, make sure that the yeast is activated properly before adding it to the dough by proofing it in warm water or milk with a bit of sugar.
It's likely the rolls aren't fluffy because the dough didn't have enough time to rise or because you yeast is expired or inactive. It's very important to make sure you complete the yeast activation step in this recipe and make sure you're using active yeast.
Yes you can! If you don't have active dry yeast, you can use quick rise (known as Instant) yeast and you don't have to give it proofing time at the beginning of the recipe. You can add it immediately to your dry ingredients and mix in. However, I still suggest proofing regardless to make sure the yeast is doing what it's supposed to do, but it's not a deal breaker for making this recipe!


Kaitlynn
If I don’t own a cast iron ( been meaning to get one just haven’t ) what could I use? Trying to make this today while it’s raining but don’t have a cast iron skillet.
lilyloutay
You can use a baking sheet with parchment paper or butter!
Kaitlynn
Ooh a baking sheet? Not a baking dish? Okay thank you! I absolutely love all your recipes!