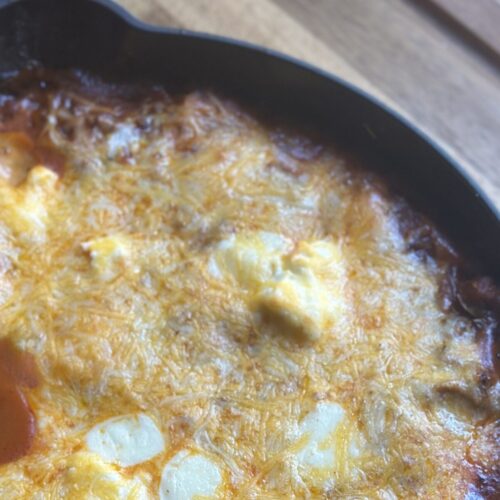
Baked Ravioli with Cheesy Meat Sauce
Let's make our ravioli from scratch and make a baked pasta dish that's gonna become your family's favorite! Between the cheesy meat sauce and hand crafted ravioli, it's not only delicious, but a blast to make, especially with the kids!

This recipe is a great lunch or dinner recipe and makes for excellent leftovers too!
This was inspired by my Baked Creamy Mac & Cheese recipe and my Made From The Heart Lasagna. I used my own Homemade Beef Bone Broth in the meat sauce and my Homemade Pasta Recipe for the ravioli. All around, quite a success!
Ingredients
*See recipe card for quantities*
Ravioli
- 2 cups all-purpose flour
- 4 whole eggs
- ½ tsp salt
- 1 tbsp olive oil
- 8 oz cream cheese
- 3-4 stick(s) mozzarella string cheese cut into little cubes
Cheesy Meat Sauce
- 1 lb ground beef
- 2-3 cloves garlic minced
- 24 oz Tomato and basil pasta sauce
- ½ medium white onion chopped
- 1 cup beef bone broth
- 1 tbsp onion powder
- 1 tbsp garlic powder
- ½ tbsp basil
- ½ tbsp oregano
- ½ tbsp rosemary
- ½ cup shredded sharp cheddar
- ¼ cup shredded mozzarella
Instructions
Here's what the process will look like!

Combine ravioli dough ingredients to craft your pasta dough. Then let dough chill in fridge for 30 minutes.

Form into ball shape with your hands

Press into patties on the tray

Place into oven at 350 fahrenheit
Hint: don't forget to chill your dough!
Substitutions
- Gluten Free - instead of using all-purpose flour, use gluten free flour. Ratio should be 1:1.
- Vegetarian - the beef hamburger meat can be replaced with a plant-based meat or you can remove the meat from the sauce altogether.
- Cheese - you can substitute any of the cheese with what you prefer! I used cream cheese because it's what I had on hand when making this, but you can use ricotta cheese in this recipe too!
Variations
- Add some greens - you can add some sautéed spinach to your ravioli filling if you want to add some greens. Wash and sauté spinach in some olive oil over the stove. Then cut up and add to the stuffing part of the raviolis!
Equipment
- 1 Large Cast Iron Skillet - I used my 10¼" Staub Cast Iron!
- 1 Cutting Knife
- 1 Cutting Board
- 1 Spatula
- 1 Rolling Pin
- 1 Fork
- 1 Spoon
Storage
- Cool Down: Allow the baked ravioli to cool down to room temperature before storing it. This helps prevent condensation, which can make the dish soggy.
- Refrigeration: Place the portions of baked ravioli with cheesy meat sauce in airtight containers or resealable plastic bags. Make sure the containers are suitable for refrigerator use. If storing the meat sauce separately from the ravioli, use the same process.
- Store in the Refrigerator: Place the containers of baked ravioli in the refrigerator. They can typically be stored in the fridge for up to 3-4 days.
- Reheating: When you're ready to enjoy the leftovers, you can reheat them in the microwave, oven, or stovetop. If reheating in the microwave, cover the container with a microwave-safe lid or paper towel to prevent splatters. If using the oven, transfer the ravioli to a baking dish and cover with foil to prevent drying out. Reheat until heated through.
- Freezing (Optional): If you want to store the baked ravioli for a longer period, you can freeze it. Place the cooled portions in freezer-safe containers or resealable freezer bags. Remove as much air as possible from the bags before sealing them.
- Thawing Frozen Ravioli: When you're ready to eat the frozen baked ravioli, transfer the portion you want to eat to the refrigerator and let it thaw overnight. Alternatively, you can thaw it more quickly by using the defrost setting on the microwave.
- Reheating Frozen Ravioli: Once thawed, reheat the baked ravioli following the same instructions as for refrigerated leftovers.
Top tip
Don't skip the step of chilling your dough for 30 minutes! It allows the gluten to settle and become more elastic to roll out and make your raviolis!
FAQ
Yes! I suggest just using gluten free flour to replace the all-purpose flour. Ratio should be 1:1.
Of course! I personally would have used ricotta if I had it on hand, but I worked with what I had in my kitchen. But you can substitute for your preferred cheese - absolutely!
Sure can! Use what you have in your kitchen.
Food safety
- Cook to a minimum temperature of 165 °F (74 °C)
- Do not use the same utensils on cooked food, that previously touched raw meat
- Wash hands after touching raw meat
- Don't leave food sitting out at room temperature for extended periods
- Never leave cooking food unattended
- Use oils with high smoking point to avoid harmful compounds
- Always have good ventilation when using a gas stove