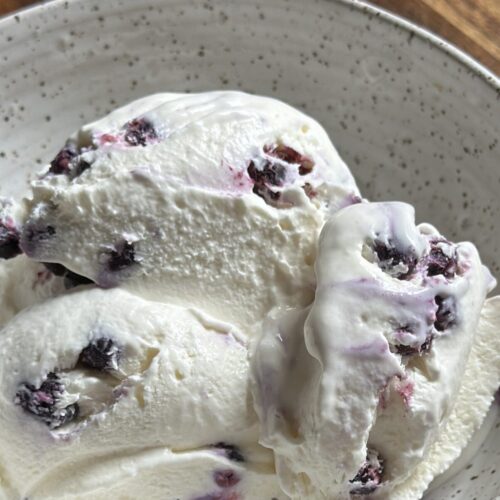
Homemade Vanilla Blueberry Ice Cream
Beat the heat with a scoop of pure indulgence straight from your own kitchen! My homemade vanilla blueberry ice cream recipe is the perfect fusion of creamy richness and fruity sweetness. With luscious (and sexy ;)) vanilla ice cream infused with juicy blueberries, each spoonful is a burst of summer bliss.
Whether you're craving a refreshing snack on a summer afternoon or looking for a delicious, low lift dessert, this ice cream will steal your heart.

Ice cream is wonderful any time of the year! But especially as we head into summer, it's going to be a constant in my freezer this year!
This recipe pairs well with many of my Dessert recipes, especially the Peach Cobbler, Sourdough Chocolate Brownies, and Classic Apple Pie.
Ingredients
*See recipe cards for quantities*
- Heavy whipping cream
- Vanilla extract
- Salt
- Sweetened condensed milk
- Blueberries (frozen or fresh)
- Cocoa powder (If you want Chocolate Flavor)
Instructions
Here's what the process will look like!

- Combine vanilla ice cream ingredients in KitchenAid Standing Mixer.

2. Transfer vanilla ice cream mix to freezer safe container.

3. Add in blueberries throughout container. Then add another layer of vanilla ice cream mix.

4. Seal and freeze for 4-6 hours.
Hint: the longer you freeze your ice cream, the stronger it'll hold when serving!
Substitutions
- Dairy Free - instead of heavy whipping cream, use full-fat coconut milk (56 oz). Place the cans of coconut milk in the refrigerator overnight. This allows the coconut cream to solidify at the top of the cans. To replace the sweetened condensed milk, use 1 cup of maple syrup or agave nectar (adjusting to taste, of course).
- Fruits - you can substitute the blueberries with your preferred fruit!
Variations
- Chocolate - add 4-6 tbsps of cocoa powder to make the ice cream flavor chocolate!
- Fruitless - if you want just the ice cream alone, remove the blueberries!
- Kid friendly - add some sprinkles before serving!
Equipment
- 1 KitchenAid Standing Mixer
- 1 Freezer Safe Containers with Cover
- 1 rubber spatula
Storage
Freezing Container: Transfer the homemade ice cream to a shallow, airtight container. A shallow container allows the ice cream to freeze faster and more evenly.
Pressing Plastic Wrap: Before sealing the container, press a piece of plastic wrap directly onto the surface of the ice cream. This helps prevent ice crystals from forming and keeps the ice cream fresh.
Top tip
Freezer for a few more hours if you want the ice cream to keep a stronger solid hold. If you want it to be served creamier, stick to 4 hours minimum. Using a more shallow container will also allow the ice cream to harden faster!
FAQ
Yes! Instead of heavy whipping cream, use full-fat coconut milk (56 oz). Place the cans of coconut milk in the refrigerator overnight. This allows the coconut cream to solidify at the top of the cans. To replace the sweetened condensed milk, use 1 cup of maple syrup or agave nectar (adjusting to taste, of course).
Absolutely! You can customize this to your liking!