Homemade Oatmeal Cream Pies
Have you ever had those Little Debbie Oatmeal Cream pies when you were growing up? Today we're throwing it back to the good ole days of childhood with my beloved recipe for Homemade Oatmeal Cream Pies. Get ready to embark on a delightful baking adventure that's sure to fill your kitchen with irresistible aromas and your taste buds with pure nostalgia.
We'll go through the process of crafting these timeless treats from scratch. Whether you're a seasoned baker looking to relive cherished memories or a beginner eager to try your hand at a classic recipe, you're in the right place.
Get ready to create a batch of these delightful sandwich cookies that will transport you back to the days of childhood lunches and after-school snacks.
Ingredients Overview
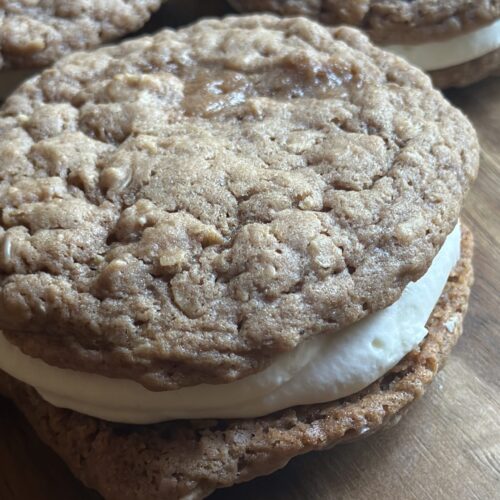
My homemade oatmeal cookies are lovingly made with rolled oats, brown sugar, cocoa powder, molasses, and a touch of cinnamon, nutmeg, and ground ginger to create the perfect balance of chewiness and warmth. But what truly sets these cream pies apart is the creamy filling that nestles between the cookies, creating a harmonious marriage of textures and flavors.
- Rolled Oats
- All-Purpose Flour
- Eggs
- Sugar
- Molasses
- Vanilla Extract
- Cocoa Powder
- Salt
- Ground Ginger
- Cinnamon
- Nutmeg
- Baking Powder
- Heavy Whipping Cream
- Vanilla Extract
- Salted Butter
- Powdered Sugar
Hint: Let the cookies cool in the fridge for about ~30 minutes before applying your Filling so the cookie sandwich holds better!
Substitutions
I've never made a Gluten Free alternative, but incase any of you want to try, please let me know how it turns out! Below are some guidelines I generally follow when I have tried to make something gluten free:
- Gluten Free - if you want to make this gluten free, try using gluten free all-purpose flour instead of regular all-purpose flour. While a 1:1 substitution ratio is a good starting point for many recipes, it's essential to consider the specific recipe, the type of gluten-free flour blend you're using, and the need for any additional binders or adjustments. Experimentation and practice will help you achieve the best results in gluten-free baking.
 Photo Credit: Huge thank you to Lily Lou Tay community family member Andrea Wozniak for sharing a photo of her Gluten Free Oatmeal Cream Pies with me!
Equipment
I love my KitchenAid Standing Mixer, but if you don't have one, you can always try this recipe by hand or with a handheld electric mixer:
- Hand Mixer: A hand mixer is a convenient and cost-effective alternative to a stand mixer. It comes with various attachments (beaters and dough hooks) and can handle tasks like whipping, creaming, and mixing cookie dough. While it's not as powerful as a stand mixer, it gets the job done for most baking recipes.
- Whisk and Elbow Grease: For recipes that require whisking, such as making meringue or whipped cream, you can use a manual whisk and your own arm strength.
Remember that while these alternatives can get the job done, they may require more time and effort compared to a KitchenAid stand mixer. Additionally, the choice of substitute depends on the specific baking task and the volume of ingredients you're working with.
Storage
We want to make these babies last a long time so if you have leftovers, here are some ways you can store 'em!
- Individually Wrap: If you plan to store them for an extended period or want to prevent sticking, you can individually wrap each oatmeal cream pie in plastic wrap or parchment paper.
- Stacking: If you're stacking them in a container, place a piece of parchment paper or wax paper between the layers to prevent sticking.
- Airtight Container: Store the wrapped or unwrapped oatmeal cream pies in an airtight container. You can use plastic containers with a tight-sealing lid or a metal tin with a good seal. Make sure the container is clean and dry before placing the cookies inside.
- Refrigeration: If you live in a very humid environment or want to extend the shelf life, you can store oatmeal cream pies in the refrigerator.
- Freezing (Long-Term Storage): For longer-term storage, you can freeze oatmeal cream pies. Wrap them individually, place them in an airtight container, and label it with the date. Frozen oatmeal cream pies can be stored for several months.
- Thawing Frozen Pies: When you're ready to enjoy a frozen oatmeal cream pie, remove it from the freezer, and let it thaw at room temperature for about 20-30 minutes. This will help it regain its soft texture.